Welcome!

This blog is no longer active, come over to www.quiltingbuttercup.com for more.

Monday, June 10, 2013

How to make casual cotton shorts


 Here's how to make casual shorts as the pair in the picture below.


Instead of getting a pattern I decided to copy shorts I already own and feel comfortable in.


 I used the pair to make a paper pattern (using the pages of the past months of my wall calender) copying the form and size of the pieces plus seamallowance.


Now it's time to trace the pieces on the fabric once, then flip the pattern over and trace a second, mirrored piece. If you have directional fabric as my stripes, pay attention to cut all pieces in the same direction.
The last piece needed is a 6 inch wide strip for the upper border.

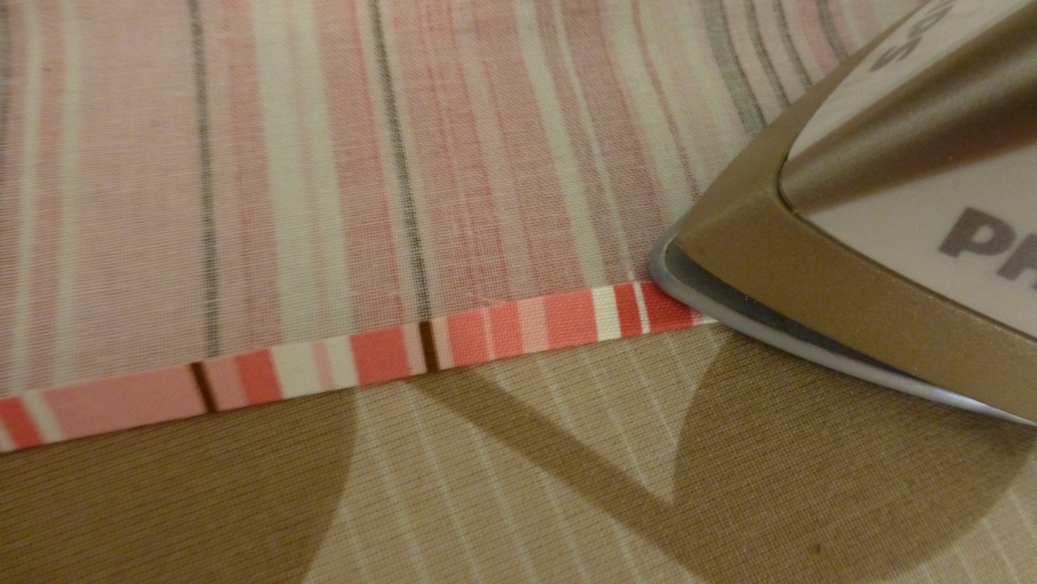
First take the two leg pieces and iron the lower edge for 1/4 of an inch towards the inside.


The turn the folded edge over another time, ironing a hem of about 1/2 an inch towards the inside of the fabric so that the raw edge is hidden inside the hem.


Now fix the seam by sewing straight along the inner edge of the hem.


The next step is to close the single leg, joining the two edges forming the inner side of the leg as shown below.


Once the legs are closed, the two legs need to be joined to form the body of the shorts. Sew a straight seam where pieces are pinned together. The upper picture shows the back, the lower picture the front part of the shorts.


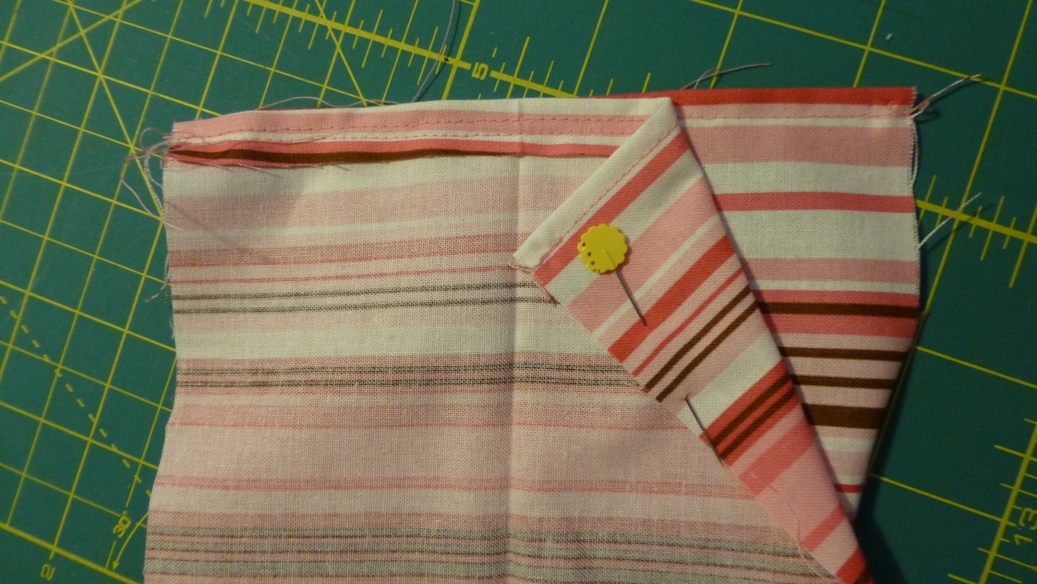
Now we need to prepare the upper border. Measure the circumference of the upper edge of the shorts and prepare the border strip of the same length considering seam allowance on both edges where a hem has to be sewn as shown in the picture below.


Then iron the strip in half lengthwise.


Turn the strip into a closed circle joining the two hemmed edges for about 3/4 of their length, leaving approximately 1/2 of an inch open (this is where the drawstring will go).


The next step is to attach the border to the shorts. Pin the border in place all around the upper edge of the shorts, making sure the open part of the seam as shown above is on the outside of the front of the shorts.


Sew all around the shorts attaching the border to the body of the shorts.


Turn the border over and and the shorts are almost ready. Now take the drawstring and insert it into the border through the opening at the front using a safety pin as a guide.


 Draw the string all the way throught the border, get the safety pin out and you're finished.

And this is your shorts will look like:


Have you made a project following this tutorial? Let me know what you think. Did you like it? Was it easy to understand and to follow? Do you have any suggestions?
Write a comment or send me an email using the contact form at the bottom of the page.


-->

Sunday, June 9, 2013

How to give stained shirts a second life

I am a clumsy person, I have to admit that, and therefore I end up with ugly stains on my shirts, which often are difficult to remove (balsamic vinegar, red wine etc.). I learned how to dye cotton fabrics with Procion MX dyes, because I didn't like the ready-to-use colours you can get that you just put in the washer with your stuff and wait to see what colour everything will turn out be when done. Procion MX dyes are relatively easy to handle (for security measures please refer to the website of Jacquard Products, a producer of Procion MX Dyes) and results are great. With a little experience you can mix any colour you want from your primary colours, and will succeed to achieve even subtle changes in hue and, when running crazy experimenting, exhilarating and fantastic designs.


Procion MX Dyes will dye anything organic, that includes your skin and hair, so wear protective gloves on your hands whenever dyeing and try not to stain yourself (I have had blue feet and red hands and can assure you that the colour vanishes in a couple of days). The dyes are sold as powders, you will have to mix them and then dilute them in water. Wear a protective mask covering mouth and nose when working with the powders. These simple masks are readily available and inexpensive.

This is what you will need:
- Old or stained T-shirts or underwear or any other natural textile (the dye will not have any or a different effect on artificial materials like plastic, so dyeing mixed fibers and fabrics can have surprising effects)
- Procion MX Dyes (I only use the primary colours blue, red and yellow plus fuchsia for some special effects)
- Soda ash
- Salt
- Plastic Buckets and/or containers (for size read below)
- protective gloves
- protective masks
- measuring instruments
- an old nylon stocking
- wooden sticks or old cookings spoons for stirring


Your workspace should be easy to clean and have access to water. I usually dye in my older "ugly" bathroom, as the the dye can easily be washed from the tiles and tub without leaving any stains, just as from my washer (my mixing surface). As an extra precaution cover your working surface with plastic foil.

Make sure the garments your want to dye are clean, if not sure wash them. Then soak them in warm water (throughout this tutorial, warm water refers to warm to the touch). When chosing the colour you want to dye your fabric consider the following aspects:
- colour of the shirt (you will need to dye a darker colour than the colour of your fabric, meaning you can't really do anything to black and very dark fabrics, but you can alter for example yellow by dyeing red in order to achieve orange and so on, or darken the colour by dyeing with bigger amounts of red on red or blue on blue)
- types of stains (if there are dark stains, dye dark, otherwise they will still be visible. I you have yellowish stains, dye orange or green so they will show less. If you have bigger stains, dye mottled colours so they will be covered up in the overall design.)
- fabric (the outcome of each recipe depends on a variety of factors apart form the actual proportions of the dyes, as for example the single fabric. It will be difficult to achieve exactly the hue you had in mind at a first try. As we are dyeing stained shirts and other textiles consider all of the elements above and you should be able to achieve the colour you had in mind, eventhough it might not be just that special hue you desired).

While the garments soak, prepare the dyes.
For solid colours you will need bigger containers, where the garment can float in the dye, and you will need to stir often. For mottled colours use smaller containers where the fabric will be crushed in the dye and left to it's own devices until time is up. The blue on the left is solid, the red mottled (you can see where it remains more yellowish and where it's more red instead of being one solid colour).


In smaller containers (I used the lower part of plastic water bottles, just cut them off with scissors) measure the quantities of dye you need. (The recipes given below are designed to dye one t-shirt, if you put more shirts, the colours will be less strong).

For simple red, blue or yellow, measure 3 tablespoons of dye of your choice into the container (we're using bigger amounts to get bright, strong colours, for lighter colours, use only half the dye, for pastels even less). For other shades you will need to mix your dyes to achieve the desired effect.

I am dyeing the following colours today:

- white stained shirt with dark stains: solid blue

left: before, enlarge the picture you can see the stains on the front

right: after


- white shirt with small spots: mottled reddish orange

left: before, enlarge so that
    you can see small dark  
    spots on  the front

    right: after


- grayish shirt with small spots: solid medium mauve

left:  before, enlarge
       in order to see the
       stains on the front

        right: after


- grayish shirt with small spots: solid light periwinkle blue

left: before,
             enlarge to see
             stains
             on the front
   
             right: after


As you can see in the "after" pictures the dyes had no effect on the thread, which is probably polyester, and thus remained completely white.

I used these recipes:

darker blue:  1/8 table spoon red and 4 table spoons blue
reddish orange: 1 1/2 table spoon red and 1/2 table spoon yellow
medium mauve: 1/16 table spoon blue and 1/2 table spoon fuchsia
light periwinkle blue: 1/2 table spoon blue and 1/32 table spoon fuchsia

For the last two recipes consider that the shirts I am dyeing were grayish, so the result will be different when dyeing white or differently coloured fabrics. Always take the colour of your garment into consideration, if it's already yellow and you want to dye it orange, use less yellow dye.


Now let's get started: measure your dyes into smaller containers and add half a cup of warm water. 

  
Stir, stir and stir until all the dye has dissolved.


Now add another cup of warm water, stir again and then add the same amount of salt and soda ash as you used dye powder (if you used a total of 3 table spoons of dye, add three table spoons of salt and soda ash; if you make the reddish orange you used a total of two table spoons of dye, thus you need to add two table spoons of salt and soda ash each). Stir again until everything is dissolved.
Now prepare your containers, bigger buckets for solid colours smaller containers for mottled colours (the containers should be big enough to easily accomodate your fabric crunching it into the container).

Start to filter the dyes into the single containers using an old nylon stocking as shown below:


How to make a shopping tote

This shopping tote is an easy to make classic. Using a cute fabric the tote becomes a practical accessory that you can fold and keep in your purse for when you need another bag for your shopping, to go the market or, even, the sea.


For the measurements I used a tote I received as a gift on a fair. I folded the fabric and placed that tote with the lower and right side aligned with the edges of the folded fabric. The finished tote measures 17 x 20 inches. If you don't have a tote you can model from, cut a 18 x 44 in rectangle (18 is the width of the unfinished tote, while the height will be 22 in, as the rectangle will be folded over onto itself with the fold forming the bottom of the tote).


Like that all I had to do was cut along the right and left edges of the model tote without bothering about measurements.


Place you ruler along the edge to cut, make sure it is perpendicular to the lower edge of the tote and cut just outside the model tote on the right as well as on the left side.
Then place the handles of the model onto the tote in order to cut the upper edge.


Leave some space (about 1 inch) for the seam when cutting the upper edge.

And it's already time for sewing. Place your tote on the sewing machine as you cut it (that is the double folded fabric left sides out) and sew straight seams on the left as well as on the right side from top to bottom, fixing the seams at the beginning and at the end with a couple of backstitches.

 
Leave about 1/2 of an inch of seam allowance and, in this case, close the eges of the fabric with a zigzag stitch in addition to the straight seam. The zigzag stitch protects the edges so they don't unravel which is useful in this case, as the edges are not protected inside the tote and are subject to movement when the tote is being used.


For the zigzag stitch use a stitch width that makes sure you don't stitch over your straight seam and, keeping the edge of the fabric just in the middle of the presser foot, stitch the whole length of the right and left outer edges.


In the picture above you see the straight seam at a good distance from the edge and the zigzag stitch covering the edge of the two layers of fabric.

The bottom doesn't need to be sewn, as the fabric was folded and thus it's already closed.

Before being able to finish the upper, open edges of the tote we need to prepare the handles.

For the handles cut two strips that are 3 inches wide. The strips of my tote have an unfinished length of 34 in, like that they are long enough in order to easily carry the tote over your shoulder.


In order to cut the strips first place your ruler onto the fabric and cut a straight edge. Align the lower edge of the fabric with the horizontal lines of the ruler and cut perpendiculare to that lower edge.

Now place your ruler in order to cut straight 3 inch wide strips.


Prepare the strips for sewing by ironing 1/4 of an inch of seam allowance towards the inside on both sides of the strip as shown in the picture below.


Then fold the strip in half lengthwise, with the two seam allowances facing inside the strip.


In order to fix the handle this way, sew all the way along the strip on the open side as close to the edge as possible, joining the two sides.


Then sew another parallel seam as close to the other edge of the strip as possible. This second seam keeps the handle flat. The finished strip should look like this:


Now we need to prepare the seam of the upper, open edge of the tote attaching the handles in the process.

Place the tote flat on your table left side facing out, and measure the width. You want to add the handle so that the tote will be divided in thirds.


Trace the position of the handle onto the tote fabric dividing the tote in three equal parts, two outside the handle and one between the two sides of the handle. Then pin the two sides of the handles in place. One handle goes on one side of the tote, the other handle on the other side. Each handle is sewn onto the tote in two places. Pin the first handle where you traced it's position on one side of the tote and then pin the other end of the same handle on the second mark on the same side of the tote, with the same sides facing upwards.
Then pin the second handle in place in the same way.


Now you need to turn the upper edge of the tote outwards onto itself to form the seam. The end of the handle will be hidden inside the seam. Turn the fabric over for almost 1 inch and turn 1/4 of an inch of seam allowance inside.


 Pin the seam in place all around the opening of the tote and with the handles facing upwards.


Now sew all the way around, fixing the seam with a couple of backstitches at beginning and end and staying close to the lower edge of the folded fabric. When you come to where a handle is pinned, attach the handle as shown below, stopping at the end of the handle and adding an X across the strip as indicated in the picture. This will attach the handles securely so that they will not rip off if the tote is full of heavy things. There is no need to make more seams, it can all be done in one movement.


In the picture above you see how you sew along the lower edge of the folded fabric, while below you can see how the handles are securely attached to the tote:


To achieve this secure seam, follow the arrows indicated below:


Finish the seam, attaching all 4 ends of the handles securely. Then turn the tote right side out and be proud of your finished bag!


You can fold it and keep it in your purse as a backup for when you need another bag, as the tote folds up nicely and doesn't take up a lot of space, or you can just use it to carry stuff, as it is meant to be.


Have you made a project following this tutorial? Let me know what you think. Did you like it? Was it easy to understand and to follow? Do you have any suggestions?
Write a comment or send me an email using the contact form at the bottom of the page.


-->

Thursday, June 6, 2013

How to prepare a quilt sandwich

In order to prepare a quilt sandwich you need space. The best is a table, big enough to fit the whole quilt on it. If the table is a little bit smaller, it can be done, too. Otherwise, you will need to do it on the floor, which is less comfortable, but at least you will be able to do it well.

Preparing the sandwich is the basis for quilting. If it is done badly there will be creases, because the fabric is not distributed evenly on all sides. Therefore, take your time for this task, in order not to compromise the quality of the finished quilt.

Now, this is what you need:

Finished quilt top
batting of your choice, slightly larger than the quilt top
backing of your choice, slightly larger than the quilt top
Pins (the best are curved safety pins), lots of them

Iron your fabric layers in order to eliminate creases (pay attention to the batting, cotton or other natural battings may be ironed, but they doesn't crease easily, so it isn't always necessary. If you have polyester batting do not iron it, it will melt and stick to your iron).

Start by placing the backing right side down flat onto your work surface. Spread it out carefully and eliminate any bumps by stroking the fabric against the surface from the center outwards.

When the backing lies completely flat, place the batting on top. Align the edges of the two pieces and make sure the batting, too, lies completely flat on the surface.

Now add the quilt top right side up on top of the other two layers and, again, pay attention that it lies completely flat. The top should be a little smaller than the other two layers. Place it in the center of the batting, leaving about the same margin all around the quilt top.


It is better to fix the layers in some way before proceeding, in order not to move any of them. If you are working on a table that can be done with big clips.


If you are working on table that is a little smaller than your quilt, start by spreading as much of the quilt as possible on the table (it should be at least half of the quilt that goes on the table, if it doesn't go find a better location), make sure all layers are completely flat, and clip them in place. Then proceed as explained below and return to this point to work on the second part of the quilt, only when the first part is finished.


 As you see, and like so often in quilting, the problem is how to handle the bulk. The sampler quilt I am using for this tutorial is small and thus easy to handle. The blue quilt in the picture above is bigger and I am lucky enough to have a special table that I get out only for preparing quilt sandwiches of bigger quilts.
If you are working on the floor, or can't use clips for any other reason, place books or some other heavy objects in different places around the quilt in order to weigh the layers down.

Now pin the three layers together starting in the center of the quilt. Slowly move towards the outer parts of the quilt and don't forget to make sure you don't move any of the layers. This will be easier when you are working on a table and more difficult on the floor, especially if you are making a big quilt, because you might not reach the center without kneeling down on the quilt. In that case take care to flatten all three layers again, when you have finished the inner part and are about to start pinning an area that you have been moving on earlier.


Don't be frugal with pins. I know it's annoying to put lots of them, but it will pay off in the long run.


Now the three layers are lieing undisturbedly together, now is the time to fix them together like that. Once you pick the sandwich up to start quilting, the layers will move, and the better they have been pinned together, the better they will stay together during later handling. So, pin the layers together and then put some more pins just to make sure.

When done,  turn the quilt around and check that the backing is pinned to the other two layers without bumps or excess fabric caught between any two pins. If there are, get the pins out up to that point, flatten all three layers, and start over from right there. I know it's annoying, but believe me, I've learned the hard way.


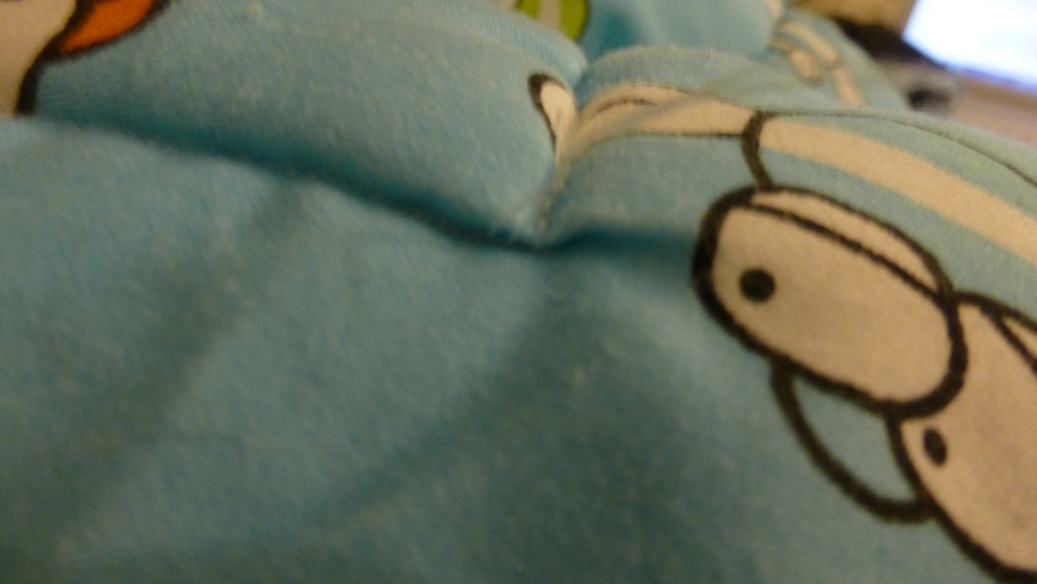
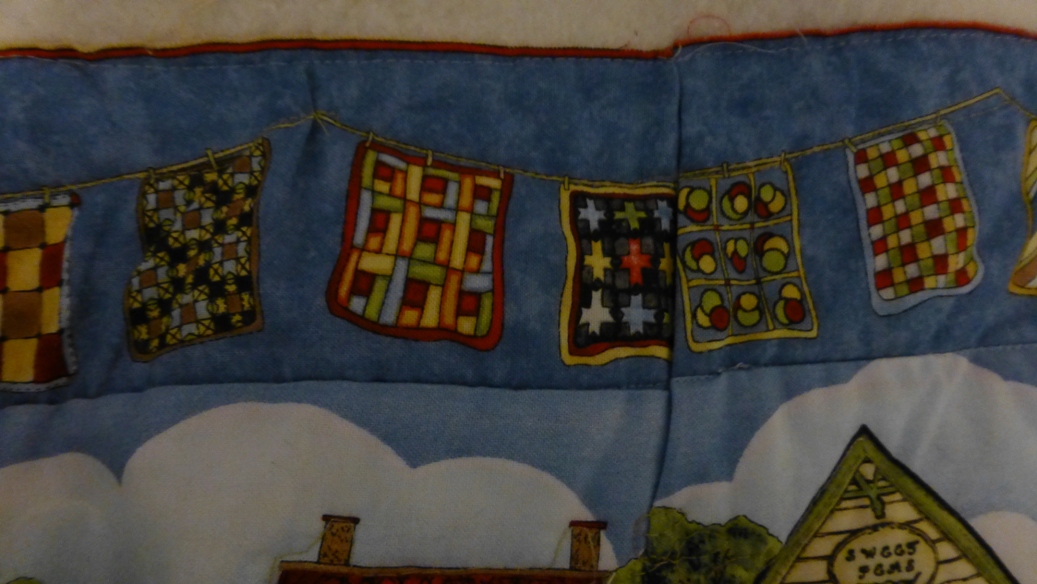
In the two pictures above you see ugly creases that happen, when the fabric is not distributed evenly. Putting some more pins reduces the risk of this.

So, eventhough preparing the quilt sandwich might seem a tedious task, especially as it doesn't produce any real progess in the making of the quilt, it is crucial for the success of the actual quilting. So take your time and pin the layers together carefully, and you won't have any ugly creases.

Have you made a project following this tutorial? Let me know what you think. Did you like it? Was it easy to understand and to follow? Do you have any suggestions?
Write a comment or send me an email using the contact form at the bottom of the page. 


-->