With the summer finally arriving I needed something to protect my face. I don't always like to wear hats, because it sometimes gets really hot underneath, and so I decided to sew myself a sun visor.
This is a really quick project, it didn't even take me an hour to make this.
You will need:
cotton fabric
thin doublesided fusible interfacing
rigid batting
Measure the circumference of your head where you want to the visor to sit. Cut two strips with a width of 4 cm of fabric, making them about 20 cms longer than your measurement. For the visor decide on the size and fitting (how big and round do you want it to be? Do you have one you like that you could copy?). I cut a half circle shape from paper and fitted it to my head adjusting it with the scissors to fit the way I wanted it to. That way I had a template to cut my shapes.
Trace the template onto the fabric once, then flip it over and trace a second shape. Trace the template once onto batting and twice (one flipped over) onto the fusible interfacing. Cut all shapes.
At last cut strips for the binding (only the front part of the visor will need binding).
Iron the fusible interfacing to both sides of the batting leaving the protective paper attached to the other side of each piece of interfacing.
Then take the protective paper off one side of the batting and iron the first piece of fabric in place.
Do the same to the second side of the visor.
Then prepare the strip for binding (for how to prepare the strip have a look at my binding tutorial). Pinning the binding in place with the rigid batting didn't work and therefore, given that we're working on a small piece, I simply attached the binding sewing slowly, putting it in place manually while I was attaching it. The binding goes only around the outer edge of the visor, not where it will be close to the head.
Now take the remaining two strips and attach them to the visor. Place each strip on one side of the visor right side to right side. aligning the two strips and placing the visor in the center of the strips, and attach them in one go as you did with the binding. Start sewing from the beginning of the strips in order to not only attach the strips to the visor, but to attach the two strips on the sides of the visor as well.
To finish fold the seam allowance on the three open edges of both sides of the strip towards the inside, pin the strips together
and sew everything together close to the open edge.
And here's teddy modelling the visor:
Have you made a project following this tutorial? Let me know what you think. Did you like it? Was it easy to understand and to follow? Do you have any suggestions?
Write a comment or send me an mail using the contact form at the bottom of the page.
-->
Thursday, June 20, 2013
How to grow garden cress
I love garden cress on my salad, but it's difficult to find here in Italy. Therefore I started to grow it myself. It's really easy and quick, and when growing your cress by yourself at least you know exactly that you're getting a biological product.
This is what you need:
garden cress seeds
a flat container
paper kitchen roll
water
Take a piece of paper kitchen roll and fold it to the size of your container. Place it inside the container, laying it flat on the bottom.
Now place the seeds on the folded paper.
Add water until the seeds are covered for about 1/4 of an inch with water.
The seeds will float on the water as you can see below.
Now place the container in a quiet sunny place. I usually leave it outside the kitchen windown sill.
Now leave the seeds to get some sun make sure to check back on your garden cress tomorrow to check if you have to add water (always keep the container wet) and to see how fast your garden cress will be growing.
Only 24 hourse later your garden cress has already started to grow:
After 4-5 days your garden cress is ready for a first harvest. Cut off as much as you need and keep the remaining cress in the container making sure they have enough water for future consumption. The brown spots are the shells of the seed, just brush them off.
By the way, growing water cress works just the same way, but it does take a longer, you will need weeks before being able to harvest.
The picture below shows water cress after 2 weeks.
This is what you need:
garden cress seeds
a flat container
paper kitchen roll
water
Take a piece of paper kitchen roll and fold it to the size of your container. Place it inside the container, laying it flat on the bottom.
Now place the seeds on the folded paper.
Add water until the seeds are covered for about 1/4 of an inch with water.
The seeds will float on the water as you can see below.
Now place the container in a quiet sunny place. I usually leave it outside the kitchen windown sill.
Now leave the seeds to get some sun make sure to check back on your garden cress tomorrow to check if you have to add water (always keep the container wet) and to see how fast your garden cress will be growing.
Only 24 hourse later your garden cress has already started to grow:
After 4-5 days your garden cress is ready for a first harvest. Cut off as much as you need and keep the remaining cress in the container making sure they have enough water for future consumption. The brown spots are the shells of the seed, just brush them off.
By the way, growing water cress works just the same way, but it does take a longer, you will need weeks before being able to harvest.
The picture below shows water cress after 2 weeks.
Monday, June 17, 2013
How to make a kitchen apron
Making this apron is easier than it looks. Just choose if you want the waist apron or the full apron and get to work.
You need to cut the following pieces:
rectangle (lower part of apron) 83x47cm
frilly bottom border 130x6cm
sashing strip 180x16cm
pocket 15x15cm
only full apron:
neckholder strip 60x6cm
top see illustration below
Start by ironing the hem of the lower part (both short sides), frill strip (both short sides and one long side) and pocket (upper edge). First iron 0.6cm seam allowance towards the wrong side of the fabric, then fold the fabric again so that the raw egde of the fabric is hidden inside the hem.
For corners iron first one side, then the other. Sew the hem in place keeping the stitching close to the edge.
On corners keep sewing until just short of the edge, with the needle down lift you presser foot and turn the fabric, keep sewing along the next side.
The next thing to do is to ruffle the lower border. To do that set your machine to a simple straight stitch and increase stitch length to 4 or 5.
make sure you have longer ends of thread at the beginning and end of the seam and sew two parallel lines close to the upper edge of the strip (the one that does not have the hem).
Now untangle the ends of the threads and use the two threads on the back (bobbin thread) to ruffle the fabric.
Keep on tugging the bobbin threads on both ends of the strip to adjust the strip to the same length as the lower edge of the apron (appr. 80cm). Then distribute the ruffles evenly on the strip.
Pin the strip to the body of the apron and attach with a straight stitch. As the raw edges of the fabrics will be in contact with your clothing during use, it is advisable to protect them against fraying by zigzagging over the raw eges on the inside of the apron.
The two seams stitched for the ruffling may well be visible now, but you can easily remove the threads as they have been stitched loosely.
Now it's time to attach the pocket. Take the square and zigzag around the three raw edges of the piece.
Then iron a seam allowance of 0.6cm towards the wrong side of the fabric on the three open sides.
Place the pocket in place on the apron and sew around the three open sides with a straight stitch. Remember to fix the stitching with a few backstitches at the beginning and the end end turn the corners just as you did when sewing the hem on the ruffled strip.
For the sashing iron the long strip in half lengthwise wrong side out. Sew it close as shown below, creating narrowing ends on both sides and leaving an opening in the middle for turning the right side of the fabric outside. The red strip represents the folded fabric strip, the black lines are the seams.
Cut away excess fabric at the ends and turn the fabric inside out throught the opening.
Prepare the upper side of the body of the apron. The finished length should 56 cm. Create folds in the fabric in order to shorten the length of the edge as shown below.
Pin the fabric to the sashing and sew together. Zigzag over the open edges on the inside of the apron.
If you wanted to make the waist apron, you're done.
If you want the full apron, keep on sewing as follows:
Prepare the neckholder by ironing the strip as follows: first iron 0.6cm of seam allowance towards the wrong side of the fabric on both long sides,
then iron the strip in half lengthwise, right side out, with the seam allowances inside the strip.
Then sew the strip closed keeping the stitches close to the edge where the seam allowances have been ironed inside.
Then sew a parallel seam along the other side of the strip to keep it flat.
Now iron the hem on the upper part of the apron so that the raw edge is hidden inside the hem as was shown before on all sides apart from the lower edge. You shouldn't have problems doing this with the curves on the two sides as they were cut on the bias.
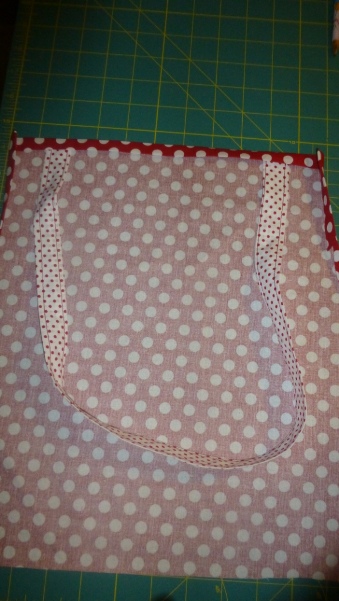
Then place the ends of the neckholder under the hem about 1.5cm from the sides on top of the piece as shown below. Make sure the strip has no turns and twists.
Then turn the neckholder over and pin it onto the hem as illustrated in the picture.
Fix the hem by sewing it in place as shown before, fixing at the same time the neckholder that has been inserted into the seam.
To finish the apron, pin the upper part to the upper edge of the sashing aligning it with the lower part of the apron and sew in place with a simple straight stitch, fix the stitching at the beginning and end of the seam with a few backstitches. Zigzag over the raw eges on the back of the apron.
Et voila, the apron is finished.

Have you made a project following this tutorial? Let me know what you think. Did you like it? Was it easy to understand and to follow? Do you have any suggestions?
Write a comment or send me an email using the contact form at the bottom of the page.
-->
You need to cut the following pieces:
rectangle (lower part of apron) 83x47cm
frilly bottom border 130x6cm
sashing strip 180x16cm
pocket 15x15cm
only full apron:
neckholder strip 60x6cm
top see illustration below
Start by ironing the hem of the lower part (both short sides), frill strip (both short sides and one long side) and pocket (upper edge). First iron 0.6cm seam allowance towards the wrong side of the fabric, then fold the fabric again so that the raw egde of the fabric is hidden inside the hem.
For corners iron first one side, then the other. Sew the hem in place keeping the stitching close to the edge.
On corners keep sewing until just short of the edge, with the needle down lift you presser foot and turn the fabric, keep sewing along the next side.
The next thing to do is to ruffle the lower border. To do that set your machine to a simple straight stitch and increase stitch length to 4 or 5.
make sure you have longer ends of thread at the beginning and end of the seam and sew two parallel lines close to the upper edge of the strip (the one that does not have the hem).
Now untangle the ends of the threads and use the two threads on the back (bobbin thread) to ruffle the fabric.
Keep on tugging the bobbin threads on both ends of the strip to adjust the strip to the same length as the lower edge of the apron (appr. 80cm). Then distribute the ruffles evenly on the strip.
Pin the strip to the body of the apron and attach with a straight stitch. As the raw edges of the fabrics will be in contact with your clothing during use, it is advisable to protect them against fraying by zigzagging over the raw eges on the inside of the apron.
The two seams stitched for the ruffling may well be visible now, but you can easily remove the threads as they have been stitched loosely.
Now it's time to attach the pocket. Take the square and zigzag around the three raw edges of the piece.
Then iron a seam allowance of 0.6cm towards the wrong side of the fabric on the three open sides.
Place the pocket in place on the apron and sew around the three open sides with a straight stitch. Remember to fix the stitching with a few backstitches at the beginning and the end end turn the corners just as you did when sewing the hem on the ruffled strip.
For the sashing iron the long strip in half lengthwise wrong side out. Sew it close as shown below, creating narrowing ends on both sides and leaving an opening in the middle for turning the right side of the fabric outside. The red strip represents the folded fabric strip, the black lines are the seams.
Cut away excess fabric at the ends and turn the fabric inside out throught the opening.
Prepare the upper side of the body of the apron. The finished length should 56 cm. Create folds in the fabric in order to shorten the length of the edge as shown below.
Pin the fabric to the sashing and sew together. Zigzag over the open edges on the inside of the apron.
If you wanted to make the waist apron, you're done.
If you want the full apron, keep on sewing as follows:
Prepare the neckholder by ironing the strip as follows: first iron 0.6cm of seam allowance towards the wrong side of the fabric on both long sides,
then iron the strip in half lengthwise, right side out, with the seam allowances inside the strip.
Then sew the strip closed keeping the stitches close to the edge where the seam allowances have been ironed inside.
Then sew a parallel seam along the other side of the strip to keep it flat.
Now iron the hem on the upper part of the apron so that the raw edge is hidden inside the hem as was shown before on all sides apart from the lower edge. You shouldn't have problems doing this with the curves on the two sides as they were cut on the bias.
Then place the ends of the neckholder under the hem about 1.5cm from the sides on top of the piece as shown below. Make sure the strip has no turns and twists.
Then turn the neckholder over and pin it onto the hem as illustrated in the picture.
Fix the hem by sewing it in place as shown before, fixing at the same time the neckholder that has been inserted into the seam.
To finish the apron, pin the upper part to the upper edge of the sashing aligning it with the lower part of the apron and sew in place with a simple straight stitch, fix the stitching at the beginning and end of the seam with a few backstitches. Zigzag over the raw eges on the back of the apron.
Et voila, the apron is finished.
Have you made a project following this tutorial? Let me know what you think. Did you like it? Was it easy to understand and to follow? Do you have any suggestions?
Write a comment or send me an email using the contact form at the bottom of the page.
-->
Friday, June 14, 2013
How to make a shirred summer dress
I go this fabulous fabric and finally sat down to sew my dress.
First cut the piece to the desired length of the dress (considering allowance for upper and lower hems). Then iron 1/4 of an inch of the upper and lower edges towards the inside of the fabric and then fold the raw edge over ironing another 1/2 of an inch towards the inside to finish the hem. Sew close to the edge.
For the shirring I used my elastic foot. In the picture below I used a straight stitch, but I you might prefer to use a zigzag-stitch that will allow you to adjust the length of the elastic later. The straight stitch will show less on the front of the dress later, but the zig-zag makes attaching and adjusting the elastic easier. Sew the elastic onto the fabric using a zigzag-stitch. The stitch should be just a little bit wider than the elastic so that it doesn't catch the elastic. That can be done without the elastic foot. Just put the elastic onto the fabric and sew the zigzag-stitch over it without catching the elastic. If you didn't catch the elastic in your stitches, you will be able to adjust the elastic inside the zigzag sewing to the desired length later.
Add as many rows of elastic as needed to gather the upper part of the
dress.
This is what the finished rows whould look like:
When done close the tube of the dress joining the two long sides.
Well done, you're dress is finished!
Have you made a project following this tutorial? Let me know what you think. Did you like it? Was it easy to understand and to follow? Do you have any suggestions?
Write a comment or send me an email using the contact form at the bottom of the page.
-->
Wednesday, June 12, 2013
How to make a quilted Phone Sheath
I needed something to protect my Blackberry from being all scratched while being carried around in my purse and so I decided to prepare a simple quilted sheath.
It is easy and quick to prepare and serves its purpose well.
You will need four pieces of fabric and two of thin batting that are a little bigger than your phone.
Place the batting on the table, put the first piece of fabric right side up onto the batting and the second piece of fabric right side down onto the first piece. Align the pieces and sew around the upper curve. About 1 inch of one longer side then around the shorter side and another inch on the following long side.
When done turn the fabric over so that the batting is inside and the two fabrics are right side out. Quilt the piece in long horizontal lines or any other way you like and put it aside to prepare a second, identical piece.
Lay the pieces on the table and place your phone in between. Make sure the closed parts are aligned with the top of the phone where the opening will be and pin them together with the phone fit in between. When done take the phone out and sew the three sides together where you pinned them together.
When done cut excess fabric along the three sides that have been sewn together away and turn the sheath inside out.
And here's your custom fit quilted phone sheath:
Have you made a project following this tutorial? Let me know what you think. Did you like it? Was it easy to understand and to follow? Do you have any suggestions?
Write a comment or send me an email using the contact form at the bottom of the page.
-->
It is easy and quick to prepare and serves its purpose well.
You will need four pieces of fabric and two of thin batting that are a little bigger than your phone.
When done turn the fabric over so that the batting is inside and the two fabrics are right side out. Quilt the piece in long horizontal lines or any other way you like and put it aside to prepare a second, identical piece.
When done cut excess fabric along the three sides that have been sewn together away and turn the sheath inside out.
And here's your custom fit quilted phone sheath:
Have you made a project following this tutorial? Let me know what you think. Did you like it? Was it easy to understand and to follow? Do you have any suggestions?
Write a comment or send me an email using the contact form at the bottom of the page.
-->
Subscribe to:
Posts (Atom)