
What you:
Cotton fabric
Contrasting fabric for the opening on the backside (see above)
First measure your pillow. Mine measures 75x47 cm.

You will need a strip that is twice as long as the length of your pillow plus about 10cm that overlap and 3cm for the hems.
Therefore my finished strip whould be 164cm long (75x2 + 10 + 4). I therefore cut a 141.2cm strip of my fabric and two 12.6cm strips of my contrasting fabric for the opening on the back. Joining the two contrasting strips to the big strip with a seam allowance of 0.6cm the finished strip will be 164cm.
The height of the strips is 50cm.
Start by creating a hem on the contrasting fabric where the two strips surrounding the opening overlap. Fold one long raw edge over twice towards the wrong side of the fabric for about 1cm, hiding the raw edge inside the fabric folds and so into place with a straight stitch close to the edge of the hem.

Now attach the strips to the short sides of the main fabric. Place the fabrics right side to right side, with the raw edged long side of the contrasting fabric on the short side of the bigger piece. Attach both strips.
If you have a serger, use that as it covers the seam allowance protecting it during usage. If you are working with a normal sewing machine, zigzag the seam allowance for protection in addition to your straight seam.

When done place the long strip on your working surface and fold it as shown above wrong side out. The front of the fabric is made up entirely of the main fabric while on the back you have the two overlapping contrasting strips. Make sure the length of one side correponds to that of your pillow, if not adjust increasing or decreasing the space where the two sides overlap.
On the back of the pillow case the short side should be about 20cm in order to firmly hold the insert in place without inserting it becoming too difficult. The longer side should be placed underneath the overlapping shorter side.
When your are satisfied pin the layers together and sew along the two long sides using your serger or adding a zigzag seam along the raw edges of the seam allowance with your sewing maching.
The pillow cushion will look like this:

Now turn the pillow case inside out through the opening and insert your pillow by sliding it first all the way into the case through the opening

and then pulling the shorter side over the top of the cushion.

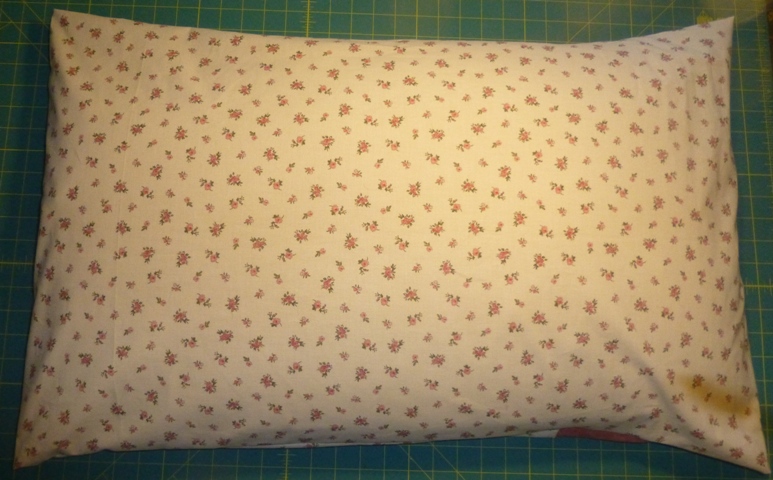
And here's your finished pillow:
Have you made a project following this tutorial? Let me know what you think. Did you like it? Was it easy to understand and to follow? Do you have any suggestions?
Write a comment or send me an email using the contact form at the bottom of the page.


-->
No comments:
Post a Comment